How to Authenticate Users with MetaMask
Introduction
This tutorial demonstrates how to create a NextJS application that allows users to log in using their Web3 wallets.
After Web3 wallet authentication, the next-auth library creates a session cookie with an encrypted JWT (JWE) stored inside. It contains session info (such as an address, signed message, and expiration time) in the user's browser. It's a secure way to store users' info without a database, and it's impossible to read/modify the JWT without a secret key.
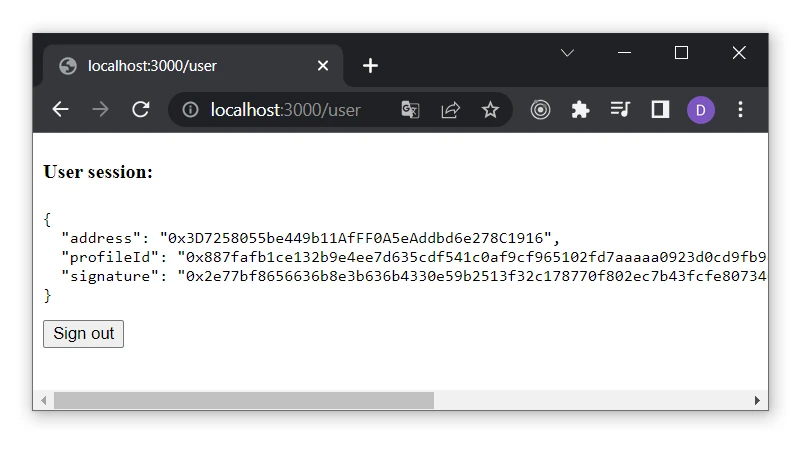
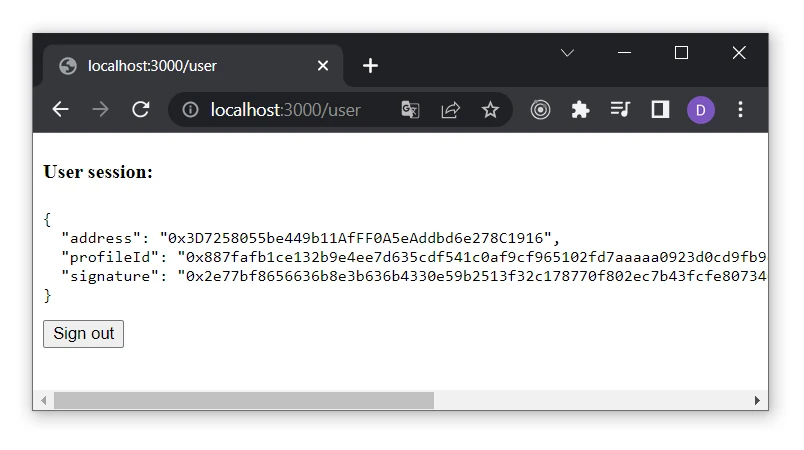
Once the user is logged in, they will be able to visit a page that displays all their user data.
You can find the repository with the final code here.
You can find the final dapp with implemented style on our GitHub.
Prerequisites
- Create a Moralis account.
- Install and set up Visual Studio.
- Create your NextJS dapp (you can create it using create-next-app or follow the NextJS dapp tutorial).
In this tutorial, we will use the latest version of nextjs and the pages directory to create our dapp.
Install the Required Dependencies
- Install
moralisand@moralisweb3/next(if not installed) andnext-authdependencies:
- npm
- Yarn
- pnpm
npm install moralis @moralisweb3/next next-auth
yarn add moralis @moralisweb3/next next-auth
pnpm add moralis @moralisweb3/next next-auth
- To implement authentication using a Web3 wallet (e.g., MetaMask), we need to use a Web3 library. For the tutorial, we will use wagmi. So, install the
wagmidependency:
- npm
- Yarn
- pnpm
npm install wagmi viem
yarn add wagmi viem
pnpm add wagmi viem
- Add new environment variables in your
.env.localfile in the app root:
- APP_DOMAIN: RFC 4501 DNS authority that is requesting the signing.
- MORALIS_API_KEY: You can get it here.
- NEXTAUTH_URL: Your app address. In the development stage, use
http://localhost:3000. - NEXTAUTH_SECRET: Used for encrypting JWT tokens of users. You can put any value here or generate it on
https://generate-secret.now.sh/32. Here's an.env.localexample:
APP_DOMAIN=amazing.finance
MORALIS_API_KEY=xxxx
NEXTAUTH_URL=http://localhost:3000
NEXTAUTH_SECRET=7197b3e8dbee5ea6274cab37245eec212
Keep your NEXTAUTH_SECRET value in secret to prevent security problems.
Every time you modify the .env.local file, you need to restart your dapp.
Wrapping App with WagmiConfig and SessionProvider
- Create the
pages/_app.jsxfile. We need to wrap our pages withWagmiConfig(docs) andSessionProvider(docs):
import { createConfig, configureChains, WagmiConfig } from "wagmi";
import { publicProvider } from "wagmi/providers/public";
import { SessionProvider } from "next-auth/react";
import { mainnet } from "wagmi/chains";

const { publicClient, webSocketPublicClient } = configureChains(
  [mainnet],
  [publicProvider()]
);

const config = createConfig({
  autoConnect: true,
  publicClient,
  webSocketPublicClient,
});

function MyApp({ Component, pageProps }) {
  return (
    <WagmiConfig config={config}>
      <SessionProvider session={pageProps.session} refetchInterval={0}>
        <Component {...pageProps} />
      </SessionProvider>
    </WagmiConfig>
  );
}

export default MyApp;
NextJS uses the App component to initialize pages. You can override it and control the page initialization. Check out the NextJS docs.
Configure Next-Auth and MoralisNextAuth
- Create a new file,
pages/api/auth/[...nextauth].js, with the following content:
- Javascript
- Typescript
import NextAuth from "next-auth";
import { MoralisNextAuthProvider } from "@moralisweb3/next";

export default NextAuth({
  providers: [MoralisNextAuthProvider()],
  // adding user info to the user session object
  callbacks: {
    async jwt({ token, user }) {
      if (user) {
        token.user = user;
      }
      return token;
    },
    async session({ session, token }) {
      session.user = token.user;
      return session;
    },
  },
});
import NextAuth from "next-auth";
import { MoralisNextAuthProvider } from "@moralisweb3/next";

export default NextAuth({
  providers: [MoralisNextAuthProvider()],
  // adding user info to the user session object
  callbacks: {
    async jwt({ token, user }) {
      if (user) {
        token.user = user;
      }
      return token;
    },
    async session({ session, token }) {
      (session as { user: unknown }).user = token.user;
      return session;
    },
  },
});
- Add an authenticating config to the
pages/api/moralis/[...moralis].ts:
import { MoralisNextApi } from "@moralisweb3/next";

export default MoralisNextApi({
  apiKey: process.env.MORALIS_API_KEY,
  authentication: {
    domain: "amazing.dapp",
    uri: process.env.NEXTAUTH_URL,
    timeout: 120,
  },
});
Create Sign-In Page
- Create a new page file,
pages/signin.jsx, with the following content:
function SignIn() {
  return (
    <div>
      <h3>Web3 Authentication</h3>
    </div>
  );
}

export default SignIn;
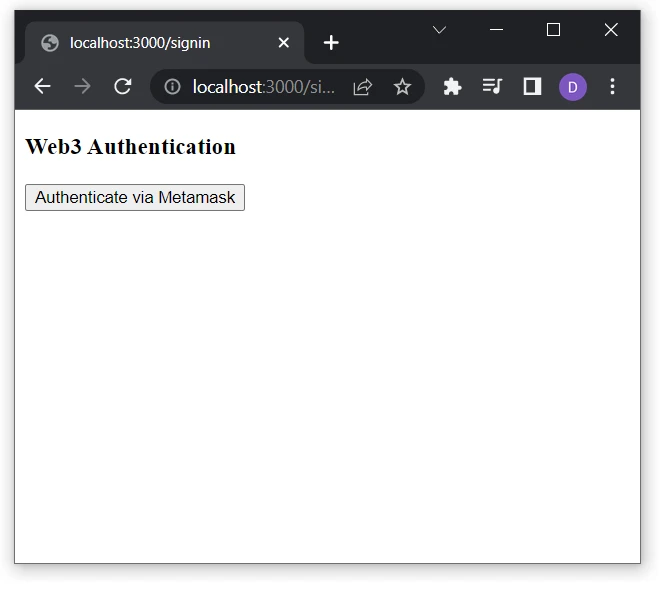
- Let's create a button for enabling our Web3 provider and
console.logusers' information:
import { useConnect } from "wagmi";
import { MetaMaskConnector } from "wagmi/connectors/metaMask";

function SignIn() {
  const { connectAsync } = useConnect();

  const handleAuth = async () => {
    const { account, chain } = await connectAsync({
      connector: new MetaMaskConnector(),
    });

    const userData = { address: account, chainId: chain.id };

    console.log(userData);
  };

  return (
    <div>
      <h3>Web3 Authentication</h3>
      <button onClick={handleAuth}>Authenticate via Metamask</button>
    </div>
  );
}

export default SignIn;
- Extend the
handleAuthfunctionality for callinguseSignMessage()hook:
import { MetaMaskConnector } from "wagmi/connectors/metaMask";
import { useAccount, useConnect, useSignMessage, useDisconnect } from "wagmi";
import { useAuthRequestChallengeEvm } from "@moralisweb3/next";

function SignIn() {
  const { connectAsync } = useConnect();
  const { disconnectAsync } = useDisconnect();
  const { isConnected } = useAccount();
  const { signMessageAsync } = useSignMessage();
  const { requestChallengeAsync } = useAuthRequestChallengeEvm();

  const handleAuth = async () => {
    if (isConnected) {
      await disconnectAsync();
    }

    const { account, chain } = await connectAsync({
      connector: new MetaMaskConnector(),
    });

    const { message } = await requestChallengeAsync({
      address: account,
      chainId: chain.id,
    });

    const signature = await signMessageAsync({ message });

    console.log(signature);
  };

  return (
    <div>
      <h3>Web3 Authentication</h3>
      <button onClick={handleAuth}>Authenticate via Metamask</button>
    </div>
  );
}

export default SignIn;
Secure Authentication after Signing and Verifying the Signed Message
- Return to the
pages/signin.jsxfile. Let's add thenext-authauthentication:
import { MetaMaskConnector } from "wagmi/connectors/metaMask";
import { signIn } from "next-auth/react";
import { useAccount, useConnect, useSignMessage, useDisconnect } from "wagmi";
import { useRouter } from "next/router";
import { useAuthRequestChallengeEvm } from "@moralisweb3/next";

function SignIn() {
  const { connectAsync } = useConnect();
  const { disconnectAsync } = useDisconnect();
  const { isConnected } = useAccount();
  const { signMessageAsync } = useSignMessage();
  const { requestChallengeAsync } = useAuthRequestChallengeEvm();
  const { push } = useRouter();

  const handleAuth = async () => {
    if (isConnected) {
      await disconnectAsync();
    }

    const { account, chain } = await connectAsync({
      connector: new MetaMaskConnector(),
    });

    const { message } = await requestChallengeAsync({
      address: account,
      chainId: chain.id,
    });

    const signature = await signMessageAsync({ message });

    // redirect user after success authentication to '/user' page
    const { url } = await signIn("moralis-auth", {
      message,
      signature,
      redirect: false,
      callbackUrl: "/user",
    });
    /**
     * instead of using signIn(..., redirect: "/user")
     * we get the url from callback and push it to the router to avoid page refreshing
     */
    push(url);
  };

  return (
    <div>
      <h3>Web3 Authentication</h3>
      <button onClick={handleAuth}>Authenticate via Metamask</button>
    </div>
  );
}

export default SignIn;
Showing the User Profile
- Let's create a user page,
pages/user.jsx, with the following content:
import { getSession, signOut } from "next-auth/react";

// gets a prop from getServerSideProps
function User({ user }) {
  return (
    <div>
      <h4>User session:</h4>
      <pre>{JSON.stringify(user, null, 2)}</pre>
      <button onClick={() => signOut({ redirect: "/signin" })}>Sign out</button>
    </div>
  );
}

export async function getServerSideProps(context) {
  const session = await getSession(context);

  // redirect if not authenticated
  if (!session) {
    return {
      redirect: {
        destination: "/signin",
        permanent: false,
      },
    };
  }

  return {
    props: { user: session.user },
  };
}

export default User;
Testing the MetaMask Wallet Connector
Visit http://localhost:3000/signin to test the authentication.
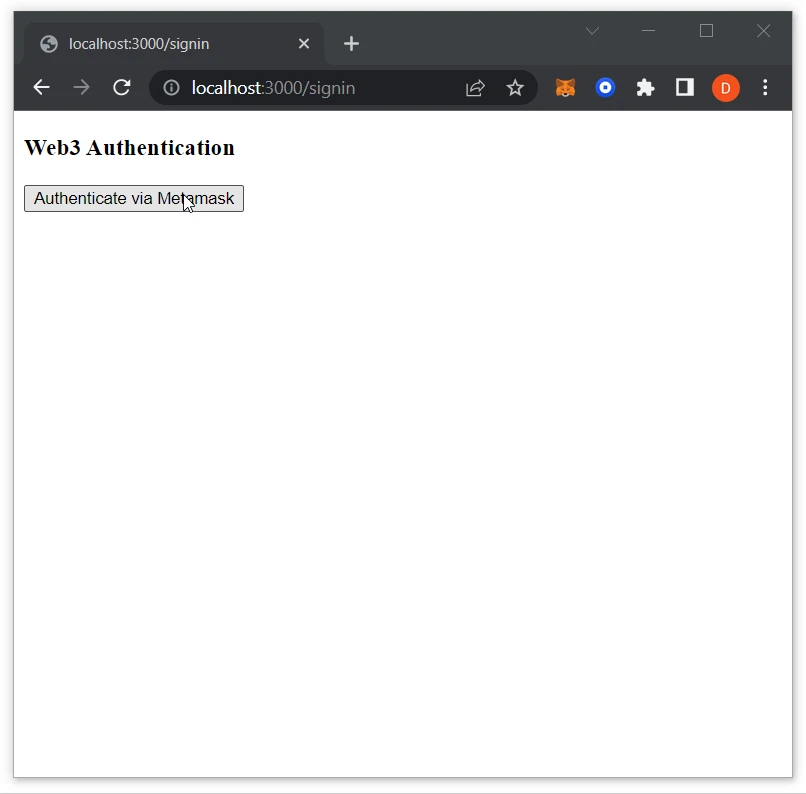
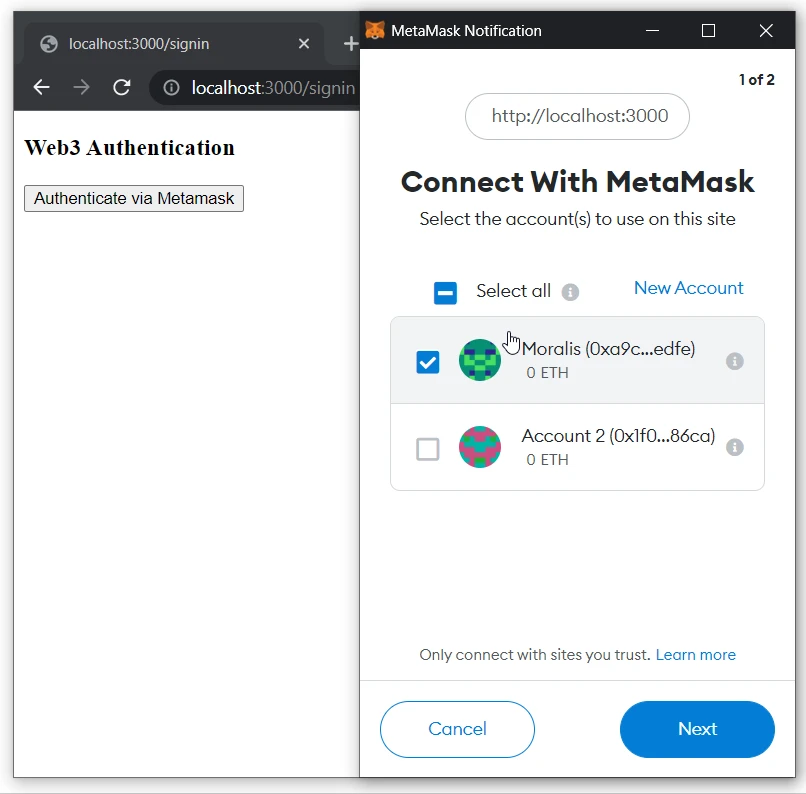
- Click on the
Authenticate via Metamaskbutton:
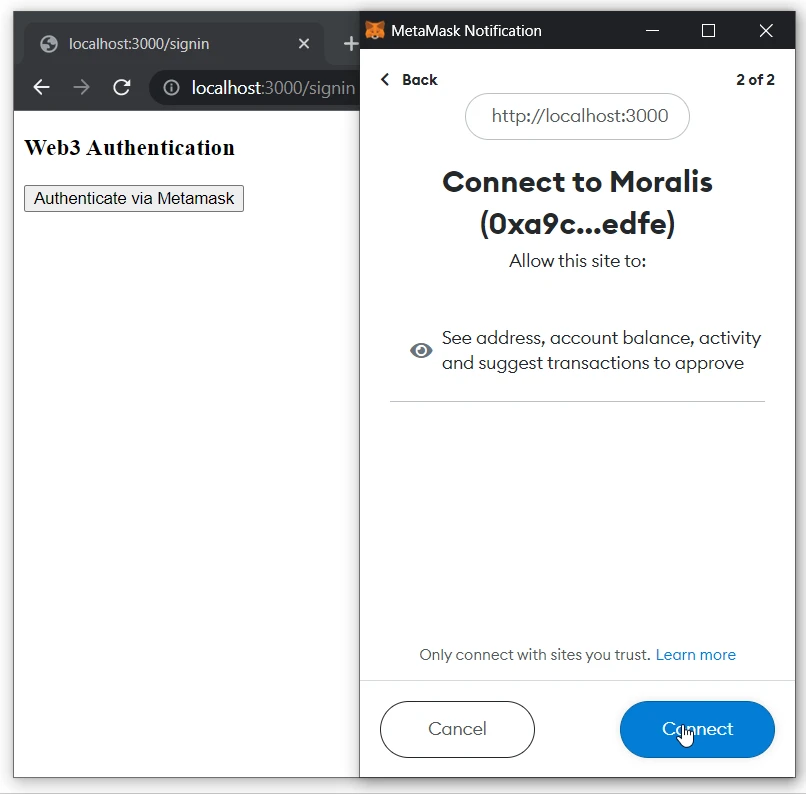
- Connect the MetaMask wallet:
- Sign the message:
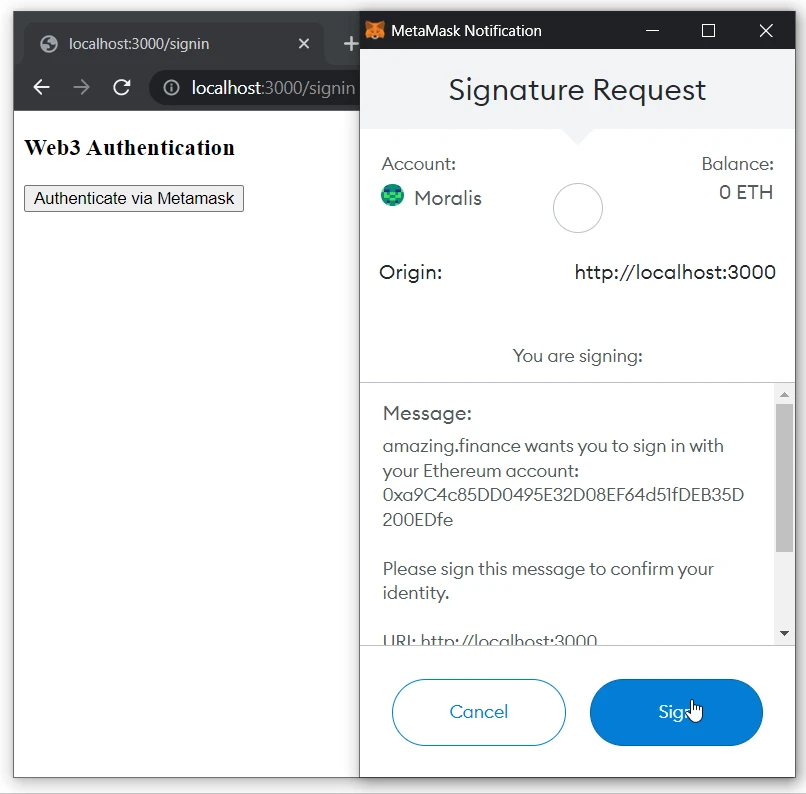
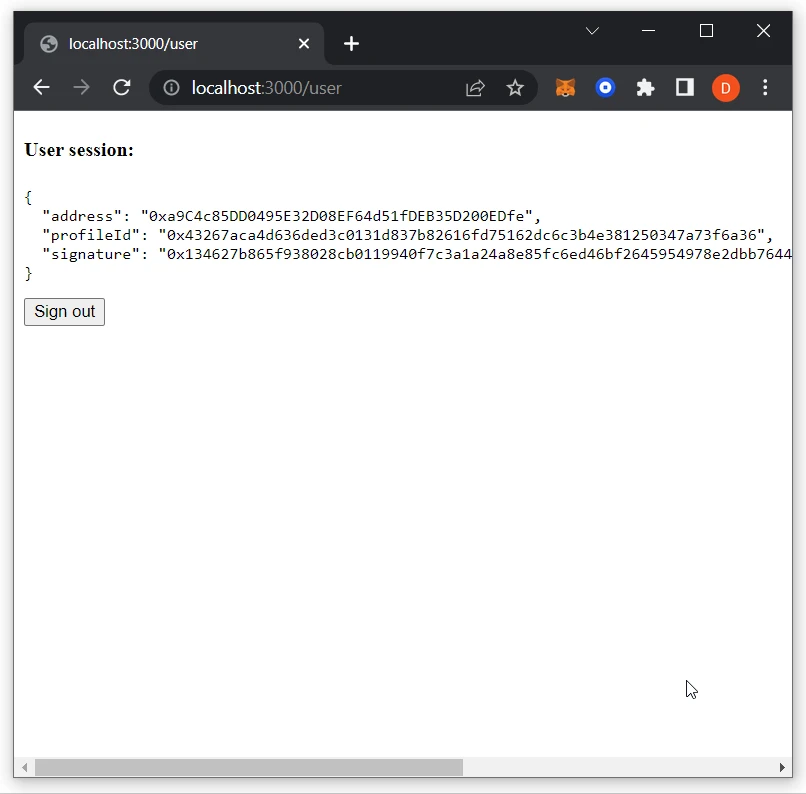
- After successful authentication, you will be redirected to the
/userpage:
- Visit
http://localhost:3000/userto test the user session functionality:
- When a user authenticates, we show the user's info on the page.
- When a user is not authenticated, we redirect to the
/signinpage. - When a user is authenticated, we show the user's info on the page, even refreshing after the page.
- (Explanation: After Web3 wallet authentication, the
next-authlibrary creates a session cookie with an encrypted JWT (JWE) stored inside. It contains session info [such as an address and signed message] in the user's browser.)
- (Explanation: After Web3 wallet authentication, the
